- What is a dab rig?
- How does a dab rig work?
- Dab rig setup: Tools you need to dab shatter and wax
- How to make dabs
- How to dab weed using a dab rig
- How to dose dabs
- How to regulate dab temperature
- How to clean a dab nail
- Cold-start dabbing
- How to take dabs without a rig
- Read more of Leafly’s guide to dabbing marijuana

Dabbing is the flash vaporization of dabs, also called concentrates, at high temperatures, and it is done through a dab rig, e-rig, or dab pen. We’ll focus on traditional dabbing with a dab rig in this guide. Check out our other resources on e-rigs and dab pens.
There’s a bit of a learning curve with dabbing, so if you’ve never done it before, it can be helpful to have someone experienced with it to show you how it’s done.
Some important things to remember when dabbing:
- Dabs are concentrated forms of cannabis, so a little goes a long way—flower is between 15-25% THC, while dabs are between 60-90% THC.
- Temperature is key when dabbing: If the nail is too hot, you’ll scorch terpenes and likely induce a coughing fit.
- Steer clear of a hot nail—it’ll be exceptionally hotter than a hot bowl or lighter.
What is a dab rig?

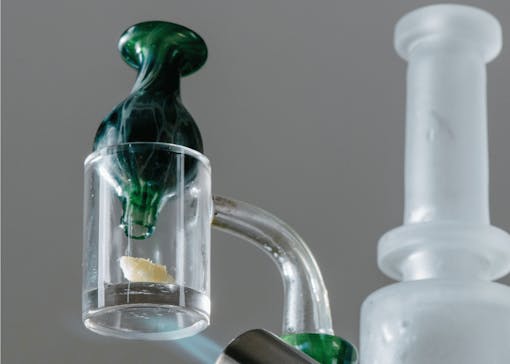
A dab rig is a water pipe used to inhale dabs. It looks like a bong, with a chamber that holds water for cooling vapor, but instead of a bowl for flower as in a bong, a dab rig has a nail for concentrates.
There are many styles of nails and one of the most common is a banger, which looks like a bucket and is usually made of quartz or borosilicate. A terp slurper is another type of nail. Nails must be able to withstand high temperatures, in the 400-600°F range, in order to vaporize dabs.
How does a dab rig work?
To take a dab, the nail of a dab rig is heated with a torch, and allowed to cool to the correct temperature. Cannabis concentrate is placed in the nail and the extreme heat vaporizes it. A carb cap is placed over the nail and the dabber inhales, controlling the airflow with the carb cap.
Vapor travels from the nail into the main chamber of the rig, and is cooled by water before hitting the dabber’s lungs.
Dab rig setup: Tools you need to dab shatter and wax
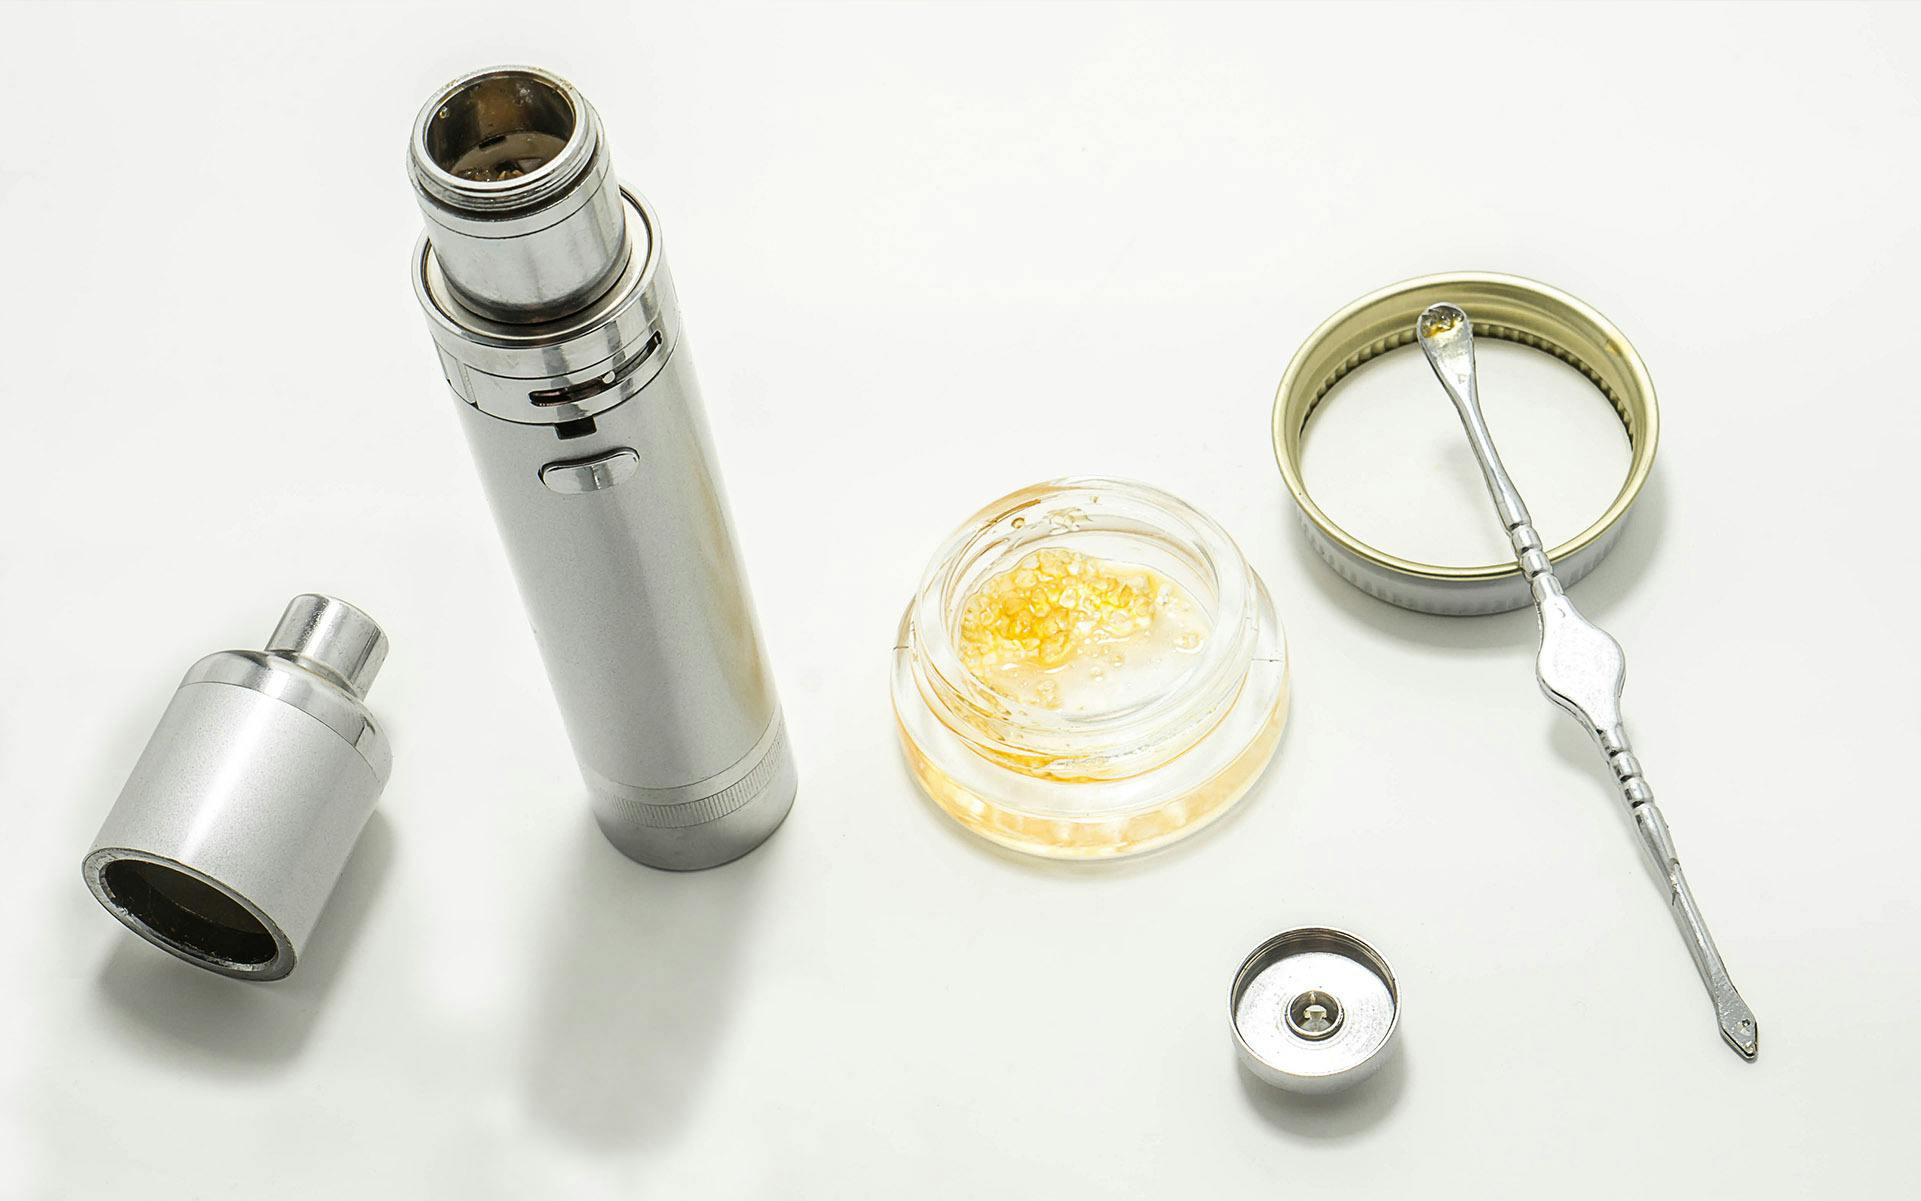
Traditional dabbing with a torch requires several accessories to get a concentrate out of its container and into your lungs. Dab technology is constantly evolving and new products and accessories are always coming out, but a traditional dab setup requires the following core items.
Dab rig
A dab rig is a water pipe that cools dab vapor before entering your lungs. It looks like a bong except it will have a fitting for a nail instead of a bowl. Dab rigs come in all shapes and sizes, but they are usually less than 1’ tall.
Nail

Similar to a bowl for a bong, a nail fits into a dab rig and is where dabs or concentrates are vaporized for inhalation. The standard nail is a quartz banger, which has a bucket shape. Nails need to withstand high temperatures, so they are made out of quartz, borosilicate, ceramic, or titanium.
Nails have different joint sizes, where it slides into the dab rig: If your rig has a 14mm stem, you’ll need a 14mm nail. They also have male and female connections—you’ll need a male nail for a female rig, and vice versa.
E-nails, or electronic nails, are devices that attach to a dab rig that heat through electricity, cutting out the need for a torch.
Carb cap

A carb cap is placed on top of a hot nail after the dab is dropped in to help regulate airflow when inhaling. To use a bong analogy: Most bong bowls can be pulled out to let in or close off air when inhaling, to regulate airflow; a carp cap does the same, allowing you to cover or uncover the nail when inhaling a dab.
Because the nail gets extremely hot when dabbing and you never want to touch it, a separate device is needed to make contact with the nail, hence a carb cap.
Although not necessary, we highly recommend using a carb cap to help regulate airflow. Combination carb cap/dab tools are great for cutting down on the amount of dab gear.
Torch

Many people use a crème brûlée torch or other kitchen torch for heating nails. Keep in mind that you’ll need to stock up on butane cans for it.
E-nails cut out the need for a torch and provide consistent heat, but are an investment.
Dab tool/dabber

All dabs are sticky, so you’ll need a tool to get the dab out of its container and into the hot nail without making a mess. Also, you want to keep your hand away from the hot nail, so you don’t want to drop a dab in with your hand.
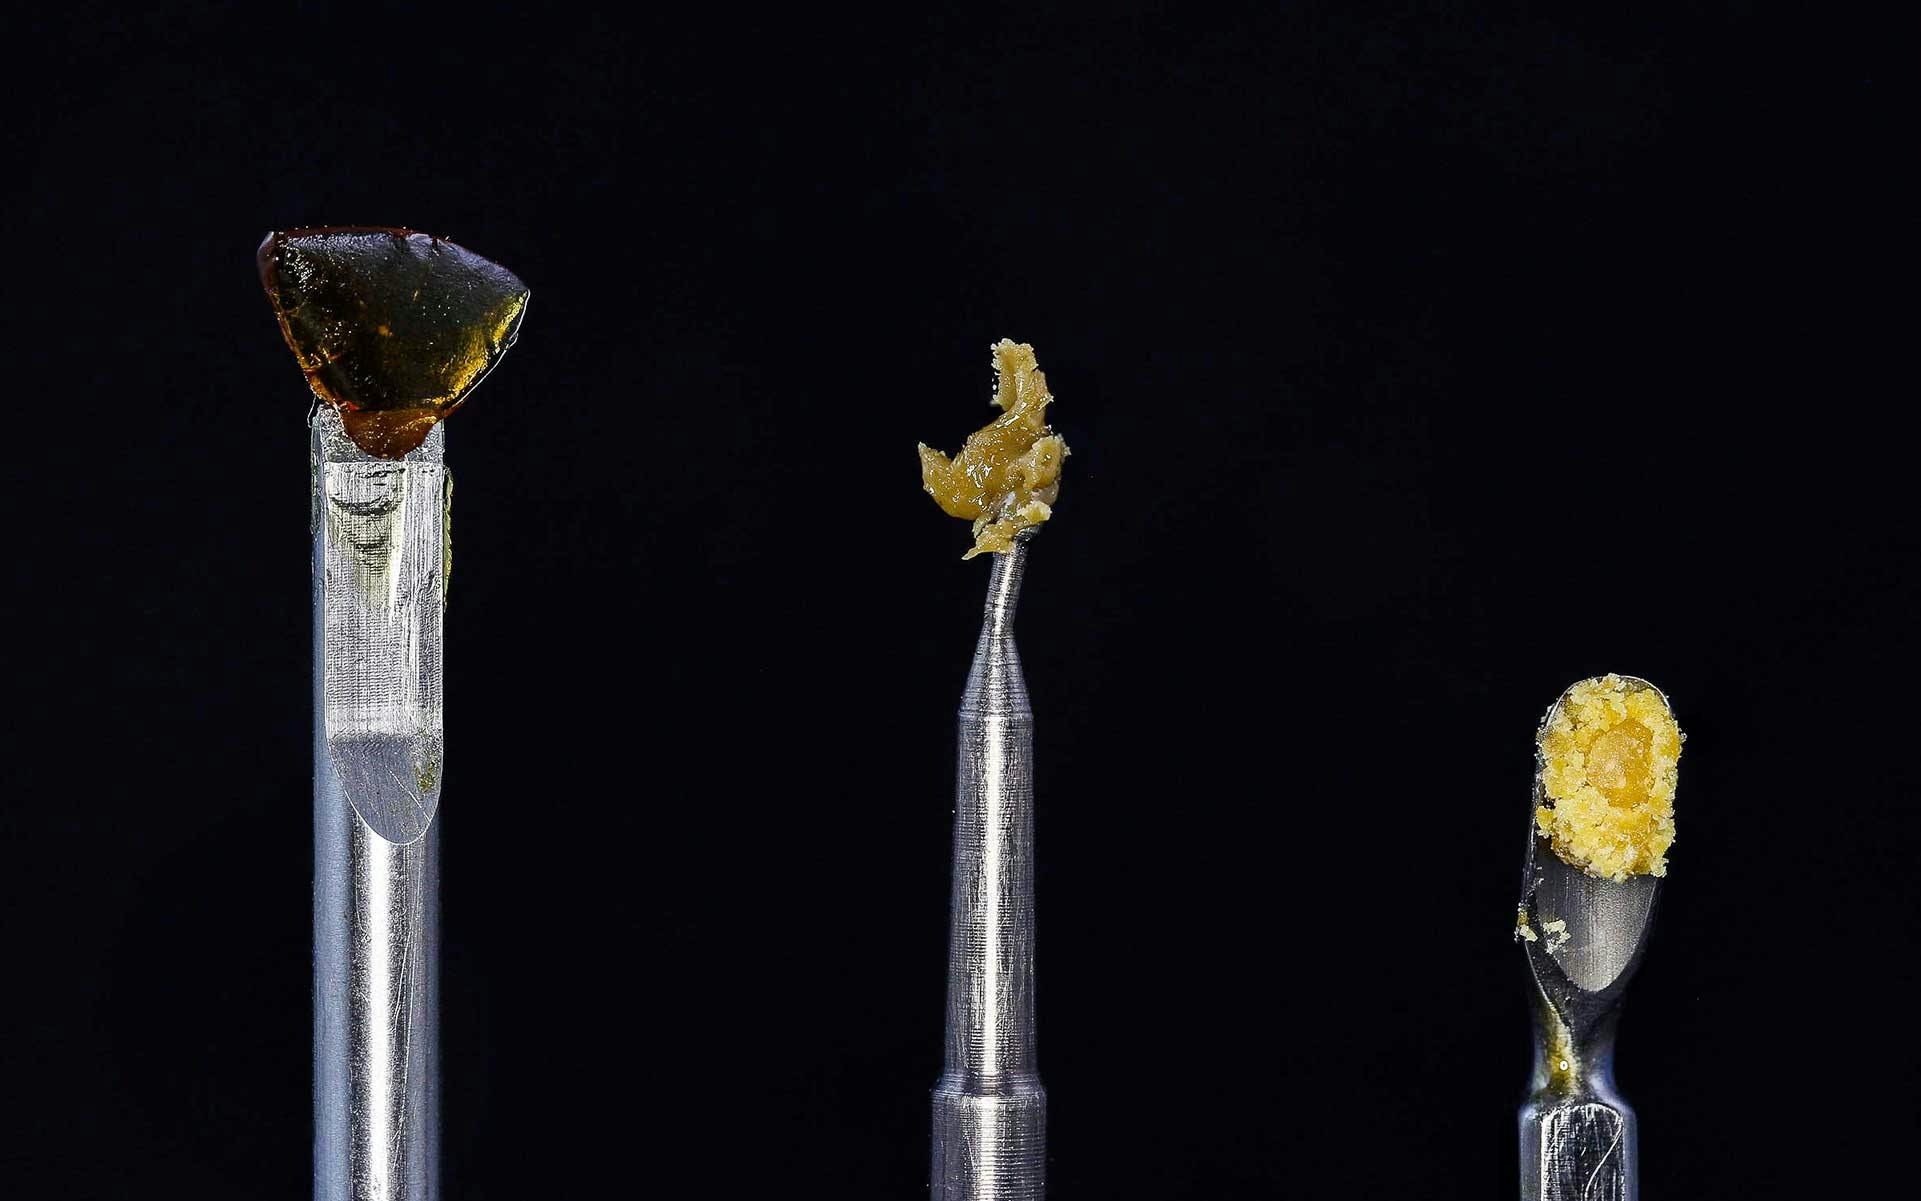
Dab tools can be metal, glass, or ceramic, and have many shapes: scoop, spatula, pick, shovel, blade, paddle, and more. Pick a shape depending on the texture and consistency of the concentrate you’re dabbing—runny dabs will need more of a scoop, while thicker ones may benefit from a paddle.
Dab mat and dab timer (optional)
Again, dabs are sticky, so a dab mat can help keep your dabbing area clean and gunk-free—it goes under your rig or dab container. It’s not required but can be nice.
Many dabbers use a dab timer to get the correct temperature and ensure the nail is heated up consistently dab after dab (more below). But some dabbers just use feel to gauge the correct temperature, so a timer isn’t necessary.

Cycling Frog Wild Cherry
5mg THC + 10mg CBD
Cycling Frog’s Wild Cherry THC Seltzer has a just-right ratio of 2:1 CBD to THC. It’s great for lounging or catching a chill buzz—not to mention there’s no hangover risk. This flavor won a gold medal from LA’s High Spirits Awards. It’s a crowd favorite!
Wild Cherry | 6 or 24 pack
We may earn a small commission if you buy through links on this page. Availability subject to law.
How to make dabs
Before you get dabbing, it’s important to note that solvent concentrates, such as shatter, wax, crumble, honey, jelly, and much more, are made using a chemical solvent such as butane. As such, these concentrates must be made by a licensed technician with the proper equipment, and cannot be made at home.
Solvents must be purged from an extraction so it is safe to consume, and only a technician licensed in a legal market will know how to do this. Incorrect solvent extraction practices can be dangerous and lead to the release of harmful fumes or even explosions.
However, some solventless dabs can be made at home using cannabis flower and simple household tools. Check out our explainers on how to make:
How to dab weed using a dab rig

Temperature is crucial when dabbing. If a nail is too hot, you’ll scorch terpenes, kill the flavor, and likely have a coughing fit. The trick is to heat the nail hotter than you want, let it cool to the correct temperature, and then drop in a dab.
Generally, you want to dab between 545-570°F, but check out our guide on dab temperatures for more specifics.
Once your rig is set up and your dab prepared on a dab tool, you’re ready to start dabbing. You may want to sit down if you’ve never dabbed before, it might be intense.
- Step 1: Turn on the torch and aim the flame directly at the bottom of the nail. Most people heat the nail until it begins to turn red hot.
- Step 2: Once the nail is hot, turn off the torch. It’s recommended to let quartz nails cool for about 45-60 seconds, and about 10 seconds for titanium nails. This is where a timer can come in handy.
- Step 3: When you have the right temp, apply the dab to the nail with your dab tool and begin inhaling slowly. Rotate the dab tool in the nail to get all of the concentrate off.
- Step 4: Using a carb cap, cover and uncover the nail while inhaling to regulate airflow. Always cap your dabs.
- Step 5: Exhale and enjoy!
How to dose dabs

Measuring a dab can be daunting. Different extracts have different THC concentrations, so a sliver of shatter might be a lot stronger than a scoop of sugar. Most solvent dabs are in the 60-90% THC range total, with a few exceeding 90%; some solventless concentrates may fall below 50%.
If you’re new to a particular type of dab or concentrate, start small and increase the dose if you feel comfortable doing so. A small dose is slightly bigger than a crumb or a sliver. It may not look like much, but that’s a lot of THC going straight into your body all at once.
Dab sizes: How big should a dab be?
Legal markets require that THC and CBD potency information is placed on concentrate packaging, which is shown as a percentage. Here’s an example for a 25 mg THC dab, a common starting amount.
If you buy one gram of hash—about the size of your thumbnail—with 80% total THC, that one gram will contain 800 mg of THC: one gram = 1,000 mg; 80% of that is 800 mg.
If you split that gram of hash into eight equal portions, each portion will have 100 mg of THC. For reference, the recommended starting dose for an edible is between 5-10 mg.
To get a 25 mg dab, you’d have to split one of those eight portions further into fourths, or split the entire one gram of hash into 32 equal parts. Again, the full gram is about the size of your thumbnail, so one 25mg dab of 80% THC hash is about the size of a few grains of rice.
There’s a big difference between a dab that’s the size of a few grains of rice and several grains of rice—about 25 mg vs. 50 mg, which is a big difference in THC.
Portions will also change depending on the potency of your dab—if it’s 90% THC, you would need even less than a few grains of rice for a 25 mg dab. Reading the label for potency information is important so you don’t dab too much.
Always start small when taking a dab
As with edibles, when dabbing, start low and go slow. Don’t be afraid to take a tiny dab; you can always take another.
Every person’s body is different and will interact with cannabis in a unique way—our endocannabinoid systems all operate differently. A dab of a certain size may affect your friend just fine but may be way too much for you.
How to regulate dab temperature

There are a few ways to check and control temperature when dabbing with a torch:
- Timer
- Experience
- Infrared temperature gun
A lot of dabbers rely on a timer when dabbing. Try heating the nail with a torch for 30 seconds and let it cool for 60 seconds before adding the dab to the nail. This is a rough estimate, so you may need to experiment to find your preferred time.
Some dabbers simply rely on experience and feel the heat radiating off a hot nail with their hand. This will take a bit of trial and error and is less accurate than using a timer.
To do this, try heating the nail with a torch until it’s barely glowing red—about 30 seconds—prepare your dab, and then hold your hand at least 6” away from the cooling nail. Once the nail has cooled so there isn’t a direct pinpoint of heat on your palm, it’s ready for a dab. Again, you’ll need to experiment to find the sweet spot.
You can also use an infrared dab temperature gun, which uses a sensor or laser to measure heat. Heat your nail, prepare your dab, and point the gun at the cooling nail. It’ll tell you the exact temperature so you can add the dab at the right moment.
The easiest way to regulate heat is to use an e-nail or e-rig—these electronic devices allow you to dial in to an exact temperature and don’t require a torch. Each device is different so be sure to read the instruction manual on how to set it.
How to clean a dab nail
Carbon, reclaimed oil, and particulates can build up in a nail. A lot of dabbers clean the nail after each hit, but it should at least be done at the end of each session. Here are some of the best ways to clean a nail:
- Q-Tips. After each dab, use a Q-Tip to soak up any leftover oil while it’s still wet. You can swab an end in isopropyl alcohol to get out little bits of char.
- Torch. Heat your nail with a torch without adding concentrate to burn off any residual carbon or reclaim. After your nail gets red hot and the residue dissipates, let it cool down completely before finishing it off with a scrape.
- Scrape. For minor buildup, use a sharp dabber tool to lightly scrape your nail. Be careful not to chip any glass.
- Wash. Soak the nail in 91% isopropyl alcohol for 10 minutes and then wipe or scrape it.
Cold-start dabbing

Cold-start dabbing, “reverse dabbing,” or “dabbing cold,” is a different way to dab that preserves terpenes and flavors more than hot dabbing. It’s also a form of low-temp dabbing.
As the name implies, with cold-start dabbing, a dab is placed in a cold nail first, and then heated. The dab will begin to melt at a much lower temperature than traditional dabbing, giving the dabber a more flavorful and terpene-rich hit.
Cold-start dabbing is also great because you don’t have to wait for the nail to cool as much after each hit.
Dabbing cold will also preserve your hardware better than traditional dabbing. By subjecting your nail to less heat, you’ll reduce the potential for breakage and reclaim buildup.
The main downside to cold-start dabs, and low-temp dabs in general, is that they tend to not vaporize all the dab placed in a nail, leaving char, residue, and oil. All of these should be removed and disposed of, so your next dab starts on a clean surface, and so you can get the full flavor profile of the new dab.
How to cold start dab
Cold-start dabbing is easy and typically safer than traditional dabbing. To cold-start dab:
- Step 1: Load a dab into a clean nail without any residual char from previous dabs.
- Step 2: Cover the nail with a carb cap.
- Step 3: Light your torch and slowly heat the underside of the nail with the flame several inches away, until the dab begins to bubble and turn into a vapor—typically, this takes less than 10 seconds.
- Step 4: Turn off the torch and start inhaling while rotating the cap to create convection.
- Step 5: Exhale and enjoy!
How to take dabs without a rig
Getting all the gear together to dab can be expensive and time consuming, but there are many ways to enjoy dabs without a dab rig.
Although these aren’t the best or most efficient way to consume dabs—you might waste concentrate and not get the full effects or flavor—if you don’t want to invest in a dab rig setup, or simply don’t have one, here’s how you can dab without a rig:
- Top a bowl of flower with concentrates
- Twax a joint (roll dabs into a joint)
- Use a dab pen or e-rig
- Use a nectar collector
- Make edibles with concentrates
- Use hot knives, which can act like a hot nail
- Use a healthstone
Ready to start dabbing? Check out our selection of dabbing products to find your perfect setup.
Bailey Rahn, Will Hyde, and Patrick Bennett contributed to this article.
Edited by Pat Goggins
By providing us with your email address, you agree to Leafly's Terms of Service and Privacy Policy.


