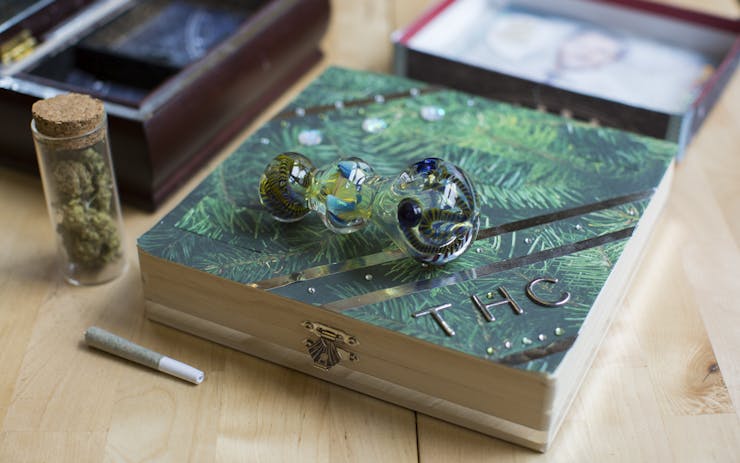
Anything can be used as a stash box—but not everything should be. That grungy Tupperware you’ve had since college, for instance? Legal cannabis deserves a better hiding place.
Enter the homemade cannabis stash box. Your cannabis stash is personal, so your stash box should be too. Luckily, it’s easy—find a box, grab some craft supplies, smoke a bowl, and let creative inspiration take over. Here’s our step-by-step to making a DIY cannabis stash box.
Step 1: Select Your Box
Before you shop, consider where you want your stash box to live. If you’ve got limited shelf space, measure and write down approximate dimensions to search for. Also, consider how much cannabis you want your stash box to hold. Then head to the local thrift store, Container Store, consignment boutique, or estate sale to find something that fits the bill.
Things that work well include jewelry boxes, cigar boxes, bread boxes, recipe boxes, tool boxes, or even small trunks (if you’re hoping to get all your cannabis accoutrements in there as well).
Pro tip: If you’d rather work with something simple and easy to glue and paint onto, you can also buy plain wood boxes in varying sizes from most craft stores.
Step 2: Round Up Your Supplies
Head to the craft store to procure any materials you desire. You can choose how fancy you want to get (on the minimal effort side of things, for instance, a cool stash box can be had with as little as a sturdy gift box, old magazines, and a glue stick). Our supply suggestions:
- X-Acto knife
- Scissors
- Sandpaper
- Super glue, glue sticks, and/or hot glue gun
- Mod Podge
- Acrylic paint (for hand painting, detail work, nooks and crannies)
- Spray paint (for a polished finish—better option for metallic paint)
- Painter’s tape
- Magazines (for decoupage)
- Stickers
- Decorative paper (wrapping paper or scrapbooking papers work well)
- Velvet, brocade, or other fabric scraps
- Ribbon
- Beads and/or old jewelry
- Rhinestones or sequins
- Glitter
Step 3: Smoke a Bowl
Great strains for sparking creativity include Kali Mist, Chemdawg, and Berry White—and you can find many more suggestions here.
Step 4: Make Your Box
Now that you’re feeling relaxed and inspired, start with whatever materials call to you. You can line the box with fabric, sand and paint the exterior, add personal touches inside and out, or do just about anything you want. A few overarching suggestions:
Use Different Sections for Different Purposes
Use smaller sections, or boxes within boxes, to hold joints and flowers to keep them from getting jostled; use larger sections of the main box to hold larger items like pipes.
Make Organization Easy
For example, if you plan to keep concentrates in one section of your box and flower in another, you can use green and amber coloring to indicate which section is for which product type.
Make It Eye-Catching
There’s no need to hide your stash away anymore, so give the box bright colors, personality, and plenty of glitz.
Make It Your Own
Incorporate things you love—associate editor Lisa Rough, for instance, chose to feature Justin Trudeau prominently, along with a little reminder to stay high.


